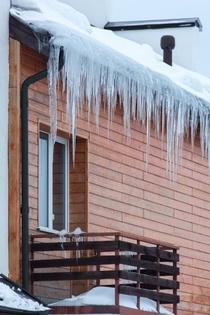
 We have previously identified what ice dams are, how they form, resulting damages, and preventive steps you can take without installing a new roof. However the ultimate fix to preventing ice dams comes when it is time for new roof installation. Preventing Ice Dams – New Roof Considerations Section R806 of the International Residential Code (IRC) for one and two family dwellings, adopted by Lees Summit and other local municipalities, establishes roof venting requirements. Your local roofing contractor should be familiar with, and apply, the IRC roof venting requirements. I like to install both a continuous soffit vent and ridge vent solution. In minimizing potential for ice dams, I had recommended increasing insulation in your attic floor to a minimum of 14” of dense-packed cellulose; this recommendation means I may need to install baffles at the roof edges to ensure that the ventilation air entering through the soffits can reach the attic space. This ensures an entirely passive ventilation system where air enters through the soffits and exits through the eaves. In doing so, the attic space will automatically stay at or near the same temperature as the ambient air, thus eliminating any potential to melt the snow on your roof from underneath and causing drainage. And since your attic is already properly insulated, there is absolutely no downside as it relates to your utility bills. As a benefit, this venting will increase the life of your roof by preventing overheating in the summertime as well. Some may criticize the ridge vent solution and say it will get covered with snow itself, but my experience has demonstrated that passive ventilation prevents snow from building up near the ridge vent to start with, even heavy snows. The second preventative step is to eliminate potential for ice dam damage, if an ice dam would occur. While this is entirely optional, the only time you can install this measure is when a new roof is being installed. And as the cost increase is minimal, I recommend this as cheap insurance. Ice and Water Shield is a peel-and-stick underlayment used instead of traditional roofing felt underlayment. I like to install this so that the Ice and Water shield extends up the roof for twice the distance of the eave depth. If you have a one (1) foot eave, I recommend Ice and Water Shield extend a total of three (3) feet up the roof (covering the eave, and twice the eave depth up the roof). For a two (2) foot eave, I recommend Ice and Water Shield extend a total of six (6) feet up the roof. As Ice and Water Shield comes in three (3) foot width rolls, this would correspond to either one (1) or two (2) passes. While Ice and Water Shield doesn’t prevent ice dams, it does make the roof watertight and prevents damages if ice dams form. This is why I consider it my insurance step; do everything possible to prevent ice dams from forming first and consider this insurance only. Follow these steps, and you can retire your snow rake and enjoy the winter wonderland without worrying about the danger that lurks beneath.
0 Comments
Your comment will be posted after it is approved.
Leave a Reply. |
Bobby WilliamsWe are an experienced Lees Summit roofing company with over 15 years experience in repair, service and installation. Archives
August 2020
Categories
All
|
HoursOpen 24/7 days a week
1206 SW Peggy Cir Lees Summit, MO 64081 Phone: 816-985-4008 email: [email protected] |


 RSS Feed

